

Outsmarting the LMS: Download Links for Google Docs
/As I have stated before, embedding a Google Doc in your LMS is infinitely more efficient than yo-yoing documents up and down from the server every time you must edit the document. You paste the embed code one time, make a couple of minor modifications, and every edit from that point on is made directly to the Google Doc. It really is that simple. The main downside to this method is that students have a hard time printing the document. Remember printing? Paper? That strange material formed from mushed up trees that can tear, slice your finger and never seems to run out of battery? Yes, many students still like to use it, and unfortunately the method I described in my previous post does not lend itself to printing at all. In fact, it is quite frustrating for the students, not to mention wasteful. Basically, your browser will print the entire web page as it displays on the screen, not just the document.
So, how does an instructor address this? Well, you could always upload a PDF or Word version of the document to the LMS that students can download and print. But wait? Doesn't that put you back in the same dilemma of uploading a new version of the document every time you make a change to the Google Doc. That actually seems like DOUBLE the amount of work!
Wouldn't it be great if you could create a link for students that lets them download the most recent version of the document in a format that is easy to print? Thankfully it is possible, and I will show you how.
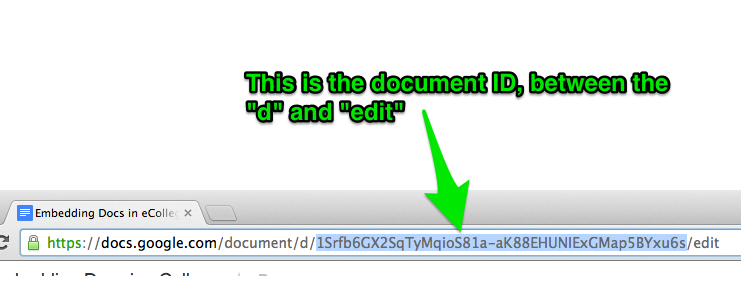
Step 1: Locate the Document ID
Each file hosted in Google Drive is given a unique (ungodly) ID, which can be found in the URL of the file. See the example below:
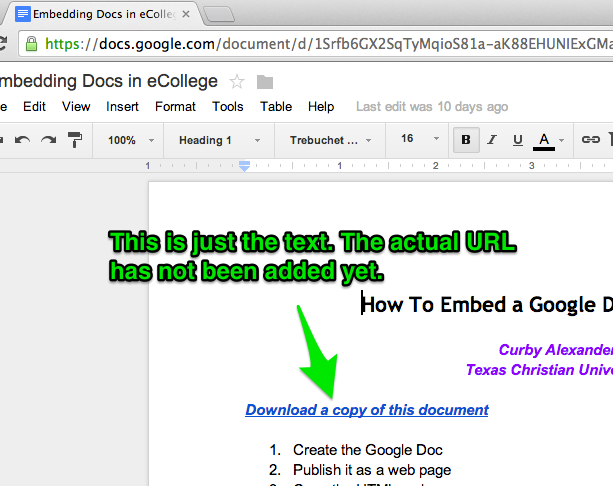
Step 2: Create a download link on the document
You will need to create a link on the document that students can click to download a print-friendly version. I put the link at the top of the document because students ... well, many of them aren't fond of scrolling. Here is an example of the download link. I tend to type the text first, then I add the URL next.
Step 3: Add download URL to the link
Now that you have a link for students to click, you need to add a URL that will prompt the browser to download the most recent version of the document. This URL will vary based on the type of Google file you are working with (e.g., spreadsheet, document, drawing, presentation). The code for each type of URL is below:
- Google Document : https://docs.google.com/document/d/[FILE_ID]/export?format=[FORMAT]
- FORMAT : docx, odt, rtf, pdf, txt, html
- Google Presentation : https://docs.google.com/presentation/d/[FILE_ID]/export?format=[FORMAT]
- FORMAT : pptx, pdf, svg, png, jpg
- Google Drawings : https://docs.google.com/drawings/d/[FILE_ID]/export?format=[FORMAT]
- FORMAT : pdf, svg, png, jpg
You will modify the text in bold to fit your particular situation. For example, if I want students to download a PDF of my example document, the URL would be:
- https://docs.google.com/document/d/1Srfb6GX2SqTyMqioS81a-aK88EHUNIExGMap5BYxu6s/export?format=pdf
In case you are new to this, here is how you add the URL to the download link you created:

This may seem like a lot of steps, but it is pretty easy once you have done a couple of them. As always, you only have to do this once for every document, and the link the link and document ID will stay the same. Let me know if you have any other helpful tricks for embedding Google Docs in your LMS, and happy coding!