Outsmarting the LMS: Creating a DIY Learning Module
Everyone is talking about the "flipped classroom." I just attended a conference where this term was used approximately 57 times every hour for 4 days. My first response to this term was positive when I heard it a few years ago. The flipped classroom is a teaching approach where teachers provide resources for students to build their background knowledge outside of class and use class time on activities that leverage face-to-face interaction, such as discussion, group problem-solving, and collaboration. This contrasts with the "traditional" model, where instructors spend class time transmitting information, and then require students to engage in the aforementioned higher-level learning tasks on their own outside of class. This concept has so much curb appeal because students, generally speaking, don't like lectures, and instructors don't really like the behaviors associated with lecturing (e.g., falling asleep, playing on phones, doing homework for other classes). Once you strip away the buzz words, the descriptions of "kids these days and their mobile computer thingies," and a mish-mash of learning theories, you realize the basic premise is the same model teachers have used for years. My teachers assigned reading outside of class, my coaches required me to lift weights and do endurance runs (yes, I'm a runner) on my own, and my music teachers expected me to practice my part so that group rehearsals were about dynamics, tempo, and other music terms I can't seem to recall. The difference, of course, is that technological innovations have changed the variety and delivery method of learning materials being pushed to students before they come to class. Teachers can compile videos, readings, simulations, quizzes, games, and other media to communicate the same concepts that were traditionally transmitted in class via lecture.
There are many tools on the web that help an instructor facilitate a flipped lesson. EdPuzzle, eduCanon, and Ted-Ed come to mind. Each of these tools has its unique affordances, but they require students to have an account and to sign in. What if you want to avoid that part and skip straight to the learning module? This is where Google Drive comes in. I will briefly demonstrate how to build a DIY learning module with Google tools and add-ons.
Step 1: Create a Google Form
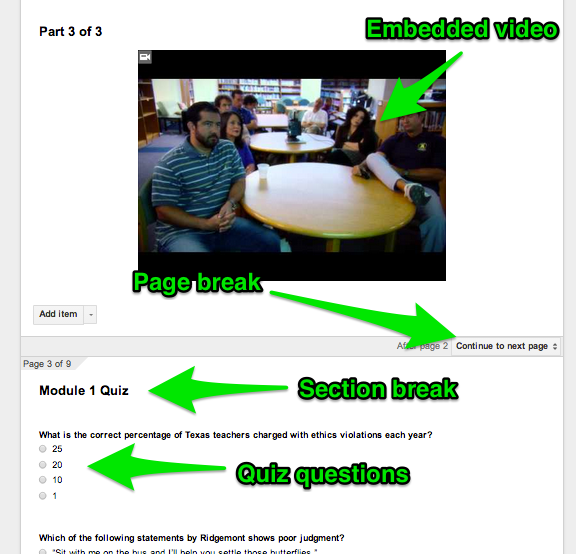
Google Forms is an excellent tool for creating web-based surveys. Users can add a variety of questions, from simple text to a grid. There are also some simple media and layout tools, such as adding images and video, page breaks and section headers. These are all great tools if you want to manage the flow of the survey. Google has created some excellent tutorials on how to create and use their forms. Below is an example of one of my forms I created a for a learning module in my college. The videos were created by a state agency for the purposes of a required training that is no longer supported by said agency. In other words, they gave us the videos and want us to handle the training in-house.
Step 2: Set up the spreadsheet
The results from this form will automatically feed into a Google Spreadsheet. This is a great way to keep track of who has completed the training, but by itself a spreadsheet is not very useful for grading the quiz. Using a simple script for Google Sheets called Flubaroo, you can create a key and automatically grade the results. The scored quizzes are put in a new sheet within the spreadsheet, and it will also e-mail the results to each student, if you choose that option. I have the spreadsheet set up so I am notified every time there is a change. Here is a example of a graded quiz.
Step 3: Create a certificate of completion
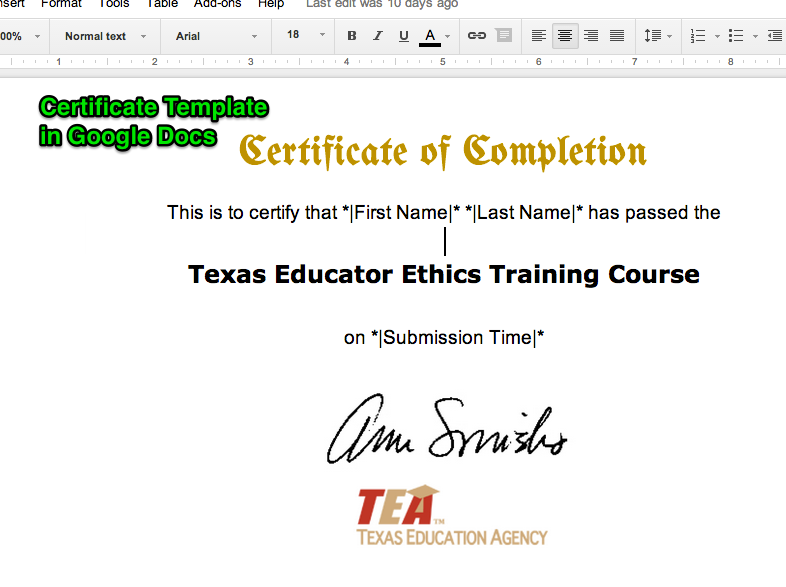
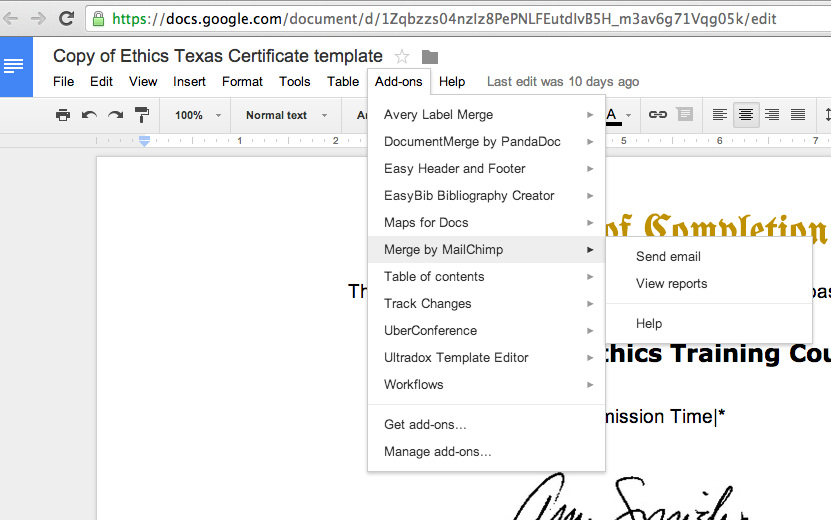
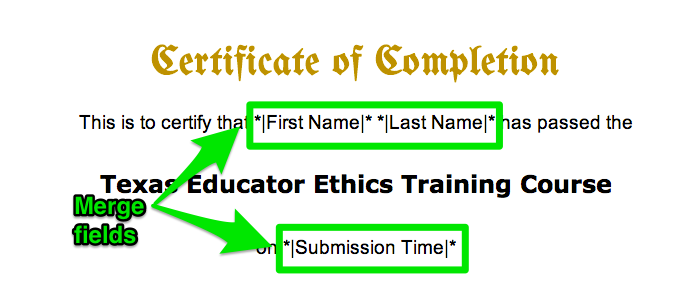
In my case, the students and faculty who complete this training need a certificate. The state agency used to do this automatically through their training module, but now we have to do it. Since there are so many people completing this training, I needed a tool to automate most of the process. My tool of choice is the Google Docs add-on Merge by MailChimp. To do this, you first add the add-on to your Drive account. You then create a merge template, like the one below:
Next, you open the Merge by MailChimp panel.
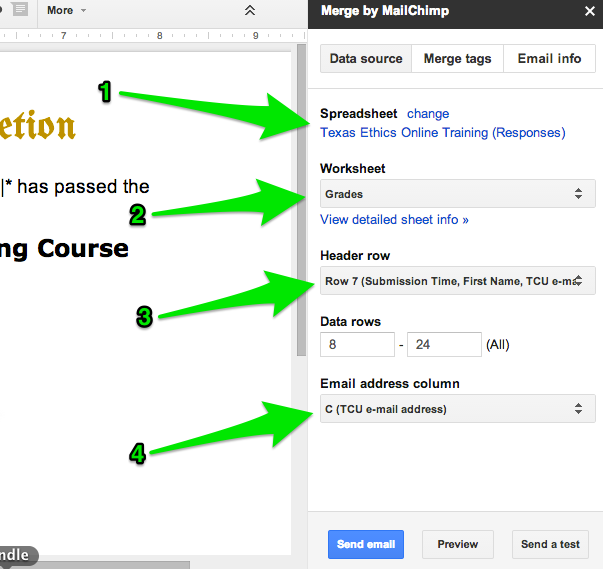
You will need to do some clicking to merge your two documents by:
- Choosing the spreadsheet you will use as your data source
- Choosing the sheet from within your spreadsheet
- Identifying the header row (which will determine the names of the merge tags)
- Identifying the column with e-mail addresses, where the merged documents will be sent
You will also need to add merge fields to the document, which will pull data from the spreadsheet and input it into the template. You do this from the Merge Tags section in the MailChimp panel by simply placing the cursor in the document where you want the merge tag and clicking the merge tag in the panel.
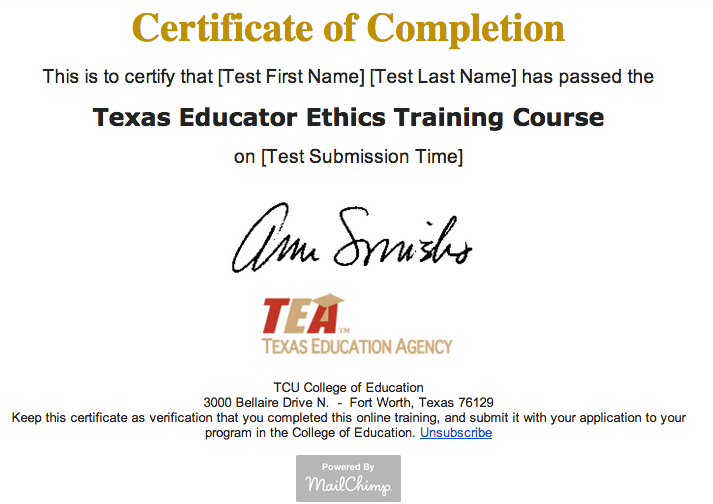
The form that is mailed to each person in your spread sheet will look something like the screenshot below. Notice, the person's e-mail client may strip out some of the formatting, such as fonts or colors. The details at the bottom of the merged document were added from the Email Info tab in the MailChimp panel. Also, the merge fields in the actual e-mail will not have brackets.
And there you have it. Yes, it is pretty involved, but not much more than doing the same thing through SoftChalk or iSpring or any other eLearning tool, and it is totally FREE! This method could be used to give students survey or test results with feedback, digital badges, or progress reports. I should add one final word, which is that there will be some tinkering along the way. Each tool I presented here has a learning curve, and unless you have used mail merge in MS Word before, this will take some patience and repetition. Coming from someone who has done this using just about every possible method and tool, this process is pretty slick once you get used to it.
So, what tools do you use for this type of learning object? Is there a step I am missing or an easier way to do this? Let me hear from you.
